

1. Start SubLane
Follow the same example, check the result, and continue to the next chapter.
This chapter has one goal: open SubLane and sign in as its administrator. The rest of the guide uses this same instance.
Prepare the environment
This tutorial uses Docker on your own computer. Have Docker with Compose, Bash, curl, jq and a usable Codex subscription ready. We will configure the client in chapter 5.
Already have an instance? Sign in and continue to the next chapter. For a remote server, follow deployment reference to establish access first; an address using 127.0.0.1 cannot be shared with another computer.
Install and start
Open a terminal where you want to keep the instance and run:
curl -fsSL https://raw.githubusercontent.com/murongg/SubLane/main/scripts/install.sh | bash -s -- --runtime docker --proxy noneThe script creates ./sublane and starts the service without overwriting an existing directory. You can read the script before running it.
Open http://127.0.0.1:8080. You should see administrator setup.
Create the administrator
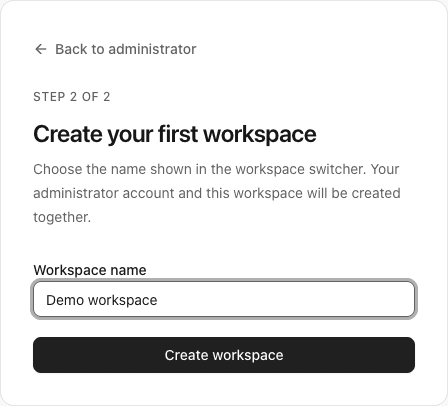
Choose a username and password following the form requirements, then continue to name your first workspace. The administrator and workspace are created together when you finish the second step. Keep your login credentials: you will use them to manage subscriptions and members.
This is a local SubLane login, separate from your Codex subscription. We connect the subscription next.
Example first-workspace setup, using a sample name:
Check the result
After signing in, you should be able to open Accounts. An empty list is expected on a new instance.
If the page does not open, check that installation completed and whether you changed the port. An initialized instance shows a login page instead of setup. Consult deployment reference for further troubleshooting.