

5. Make your first request
Follow the same example, check the result, and continue to the next chapter.
You have the instance address, your My Codex key and the model ID from chapter 2. Configure Codex CLI and verify one actual request.
The example assumes Codex CLI is installed and uses a macOS/Linux terminal. For a desktop client or another tool, open the configuration guide beside your key and use its matching client instructions.
Configure the model and gateway
Edit your user-level ~/.codex/config.toml. Merge these fields into existing settings rather than replacing the whole file:
model = "<model-id-from-chapter-2>"
model_provider = "sublane"

[model_providers.sublane]
name = "SubLane"
base_url = "http://127.0.0.1:8080/v1"
env_key = "SUBLANE_API_KEY"
wire_api = "responses"
requires_openai_auth = false
supports_websockets = true
Replace the model placeholder with an actual available ID. The address above works for this tutorial's local instance. For a remote instance, use the administrator's HTTPS address, keeping /v1 at the end.
Supply your personal key
Run these commands in the terminal where you will start Codex. Paste the key when prompted; the input is hidden and the key is not written into command history:
printf 'SubLane API key: '
read -r -s SUBLANE_API_KEY
printf '\n'
export SUBLANE_API_KEY
codex
Use the personal key from chapter 4. Set the variable again in a new terminal. An already running desktop application does not inherit it automatically; see client reference for desktop details.
Send a message
Ask a simple question, such as “Describe what you can do in one sentence,” and wait for a reply.
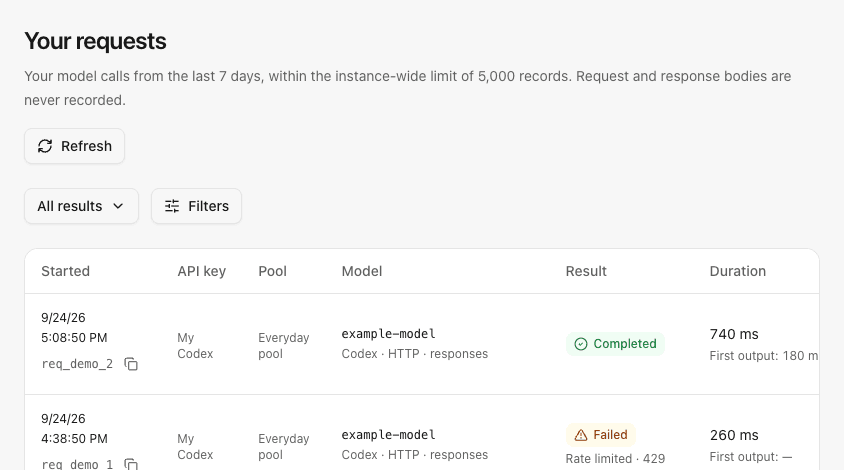
In SubLane, open Requests and find the call by its time and result. Seeing a model list alone does not verify generation.
Example request history after a client call, using synthetic records:
Check the result
A reply in the client and a matching request record complete the basic setup. You can use the gateway now without configuring allowances.
For an invalid key, check the key and instance address. For an unavailable model, check the exact ID from the pool. For other failures, use everyday troubleshooting.
If you are the only user, you can stop here. The next chapter is optional: share this working pool with colleagues.
Previous: 4. Create a personal key